This guide is a draft. The screens and screenshots have been checked; saving changes still needs a complete walkthrough.
A stage tells you how far a mount has progressed through your shop. Your stages might include Received, Mounting, Ready for Pickup, and Completed. Choose names that make sense to the people doing the work. This page explains how to set up your shop’s list of stages. To move an individual mount to its next stage, see Update mount stages.
Tip: Stage names can be as descriptive as you need.A stage name might describe the work, such as Mounting or Drying, or spell out what you need from the client, such as Book Pickup or Final Payment Required. Both use the same client update settings. These are examples of how you can name stages to suit your shop.

Open stages

  1. Open Settings.
  2. Select Stages.
  3. Select Edit Stages to make changes.
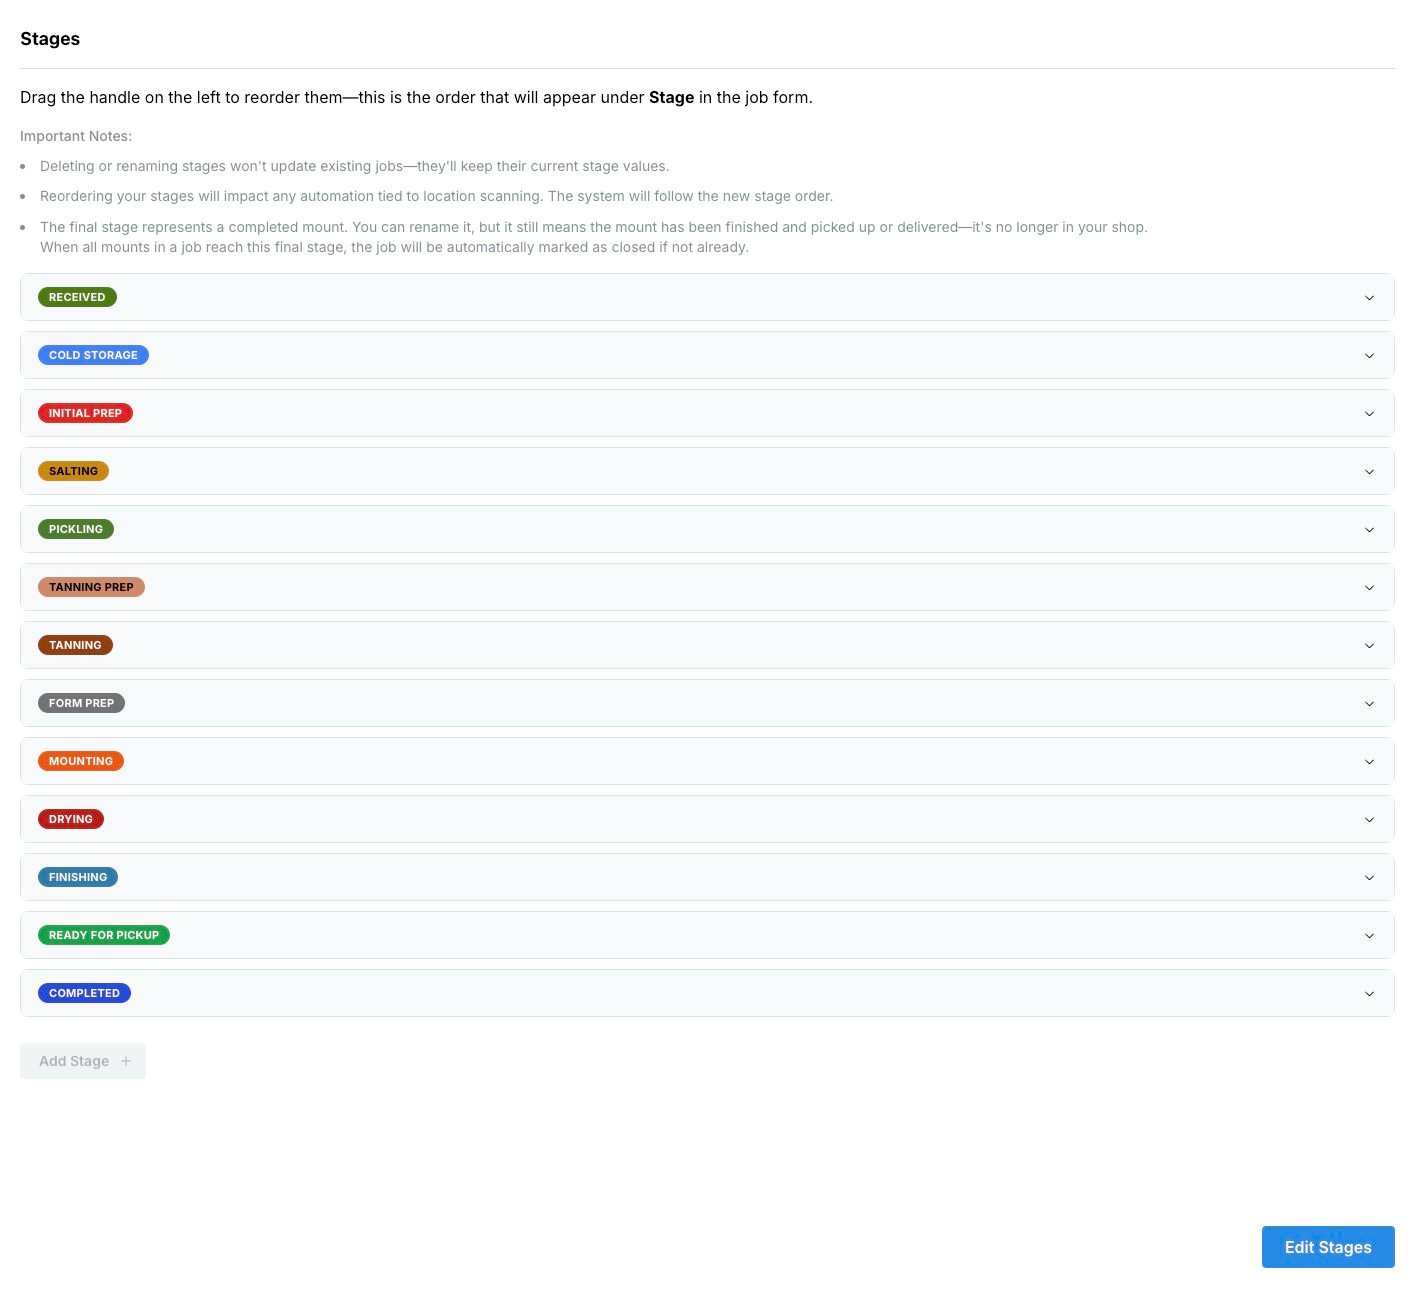
You need permission to update settings. If Edit Stages is missing, ask the person who manages your shop’s account to check your access. Stages settings showing the ordered list, Ready for Pickup before Completed, and the Edit Stages button. Your stage names and colours may differ from this example.

Understand the final stage

The last stage means the mount is finished and has been picked up or delivered. You can rename this stage, but its meaning stays the same. You cannot delete it or move it out of the last position. Keep Ready for Pickup or your equivalent before the final stage while the mount is still in your shop. When you move the last remaining mount in a job into the final stage and save the job, MountMonitor automatically marks it as closed. Closing a job and recording its payments are separate tasks; check its balance as part of collection. See Close or reopen a job.

Add a stage

  1. In Edit Stages, select Add Stage.
  2. In Stage, enter a clear name, such as Quality Check. Use a different name for each stage so your team can tell them apart.
  3. Select Create. The stage is added just before the final stage.
  4. Move it to the right position if needed, then select Save Stages.
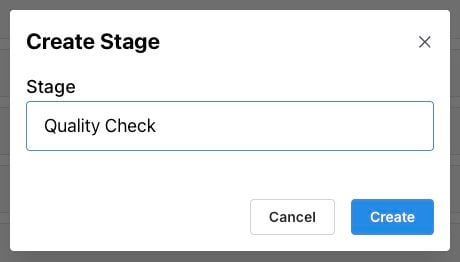
Create Stage dialog with Quality Check entered in Stage, and Cancel and Create buttons. Create adds the stage to the list you are editing. Save Stages saves the change for your shop.

Change a name or colour

Before renaming a stage, check which current jobs and location rules use it. Existing jobs keep the old stage name. Any location rule linked to the old name has its stage selection cleared when you save.
  1. If needed, select Edit Stages, then open the stage’s row.
  2. Change Stage Name or use Color to choose its colour.
  3. Select Save Stages.
  4. If you renamed it, update affected mounts and reselect the stage in any affected location rules.

An expanded Received stage showing Stage Name and Color fields, with the drag handle on the left and delete icon on the right.

Change the order

  1. If needed, select Edit Stages.
  2. Drag a stage using the dotted handle on the left of its row.
  3. Arrange the stages in the order your work normally follows, keeping the final stage last.
  4. Select Save Stages.
This is the order shown in the job’s Stage list. The first stage normally supplies the starting stage for a new mount, so put your intake stage first. If your shop uses location rules to update stages, check those rules after reordering. Location updates move a mount forward according to this order. See Set up location automation.

Remove a stage

Removing a stage does not move existing mounts to another stage. They keep the old name. Any location rule using the removed stage has its stage selection cleared.
  1. If needed, select Edit Stages.
  2. Select the trash icon on the stage’s row.
  3. Review the list, then select Save Stages. Use Cancel if you want to discard the removal before saving.
  4. Update affected mounts and location rules to use the appropriate remaining stage.
The final stage has no trash icon because it must remain in the list.

Check your changes

After saving, look for Stages updated successfully. Check that the list shows the names, colours and order you intended. You can keep editing after saving; select Cancel when you want to leave edit mode. If Save Stages is greyed out, there may be no changes to save. Cancel restores the saved list and discards unsaved changes. If an error appears, check whether the changes were saved before trying again.

Explain stages to clients

Stage pictures and common questions belong in SettingsClient Portal. See Explain progress stages to clients. Adding a stage does not turn on automatic messages for it. Review automatic client updates if you want clients to hear when their mount moves to that stage.